 English
 Italian
The multi-tenancy (MT) feature enables a single Alfresco instance to host multiple independent tenants. The single instance is logically partitioned such that it will appears to each tenant as a completely separate instance of Alfresco.
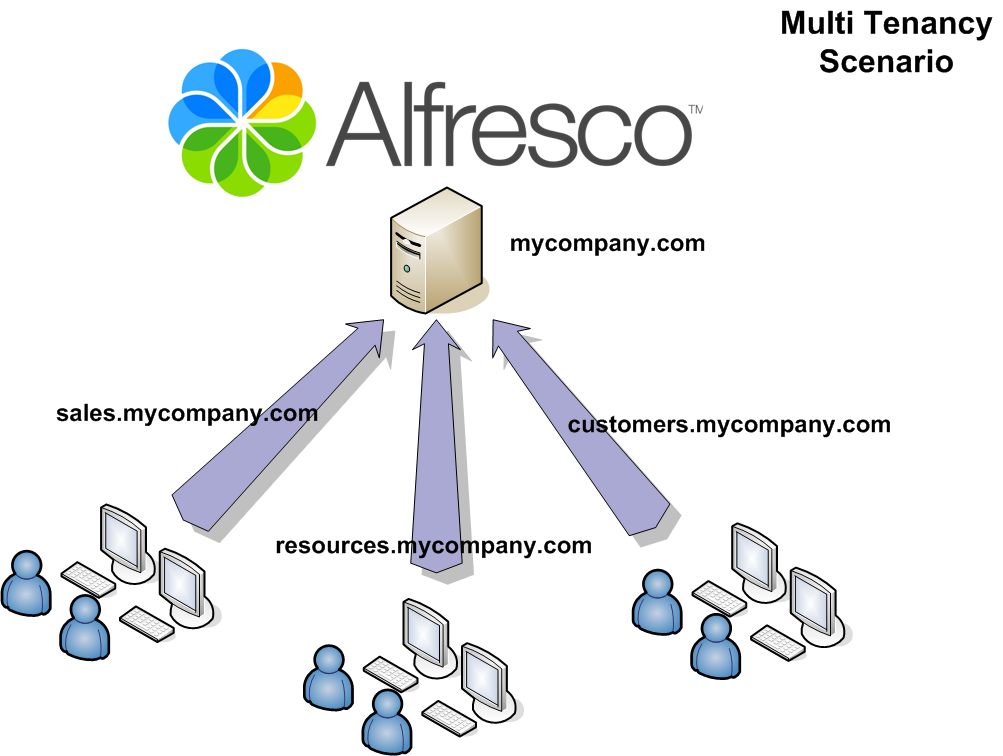
Each tenant shown in the figure will have an administrator user called admin@<tenant domain>. Let’s see how to enable MT functionality in the Community version.
Alfresco 5.0.c
In this version the web Tenant Console was removed. To create a new tenant you can use the webscript /alfresco/s/api/tenants with a json POST. Here is an example using curl.
curl -s -k -X POST --user 'admin':'admin' \
-H "Content-Type: application/json" \
-d '{"tenantDomain":"mytenant.com","tenantAdminPassword":"1234"}' http://localhost:8080/alfresco/s/api/tenants
Alfresco 4.2
– The multi-tenancy feature is not enabled by default but it is automatically enabled when the first tenant is created.
– Login as admin and open the tenant-admin console http://mycompany/alfresco/faces/jsp/admin/tenantadmin-console.jsp
– Run create tenant command:
> create sales.mycompany.com sales_admin_paasword_here
> create resources.mycompany.com resources_admin_paasword_here
> create customers.mycompany.com customers_admin_paasword_here
Alfresco 4.0 and older versions
– Go to the directory alfresco_home/tomcat/shared/classes/alfresco/extension/mt
– Remove the .sample suffix from all mt* files
– Restart alfresco
– Login as admin and open the tenant-admin console http://mycompany/alfresco/faces/jsp/admin/tenantadmin-console.jsp
– Run create tenant command:
> create sales.mycompany.com sales_admin_paasword_here
> create resources.mycompany.com resources_admin_paasword_here
> create customers.mycompany.com customers_admin_paasword_here
Other useful commands
> disable sales.mycompany.com
> enable sales.mycompany.com
> delete sales.mycompany.com

> export sales.mycompany.com /home/alfresco/alfresco-4.0.e/alf_data/exported-tenants
> import sales.mycompany.com /home/alfresco/alfresco-4.0.e/alf_data/exported-tenants

> show tenant sales.mycompany.com
> show tenants

Enabled  - Tenant: sales.mycompany.com (/home/alfresco/alfresco-4.0.e/alf_data/tenants/sales.mycompany.com)
Enabled  - Tenant: resources.mycompany.com (/home/alfresco/alfresco-4.0.e/alf_data/tenants/resources.mycompany.com)
Enabled  - Tenant: customers.mycompany.com (/home/alfresco/alfresco-4.0.e/alf_data/tenants/customers.mycompany.com)

I can not find the directory in the Alfresco 4.2.f. I can manually add ??
The “mt” directory is only for the Alfresco versions older than 4.0.
In Alfresco 4.2.f you can enable automatically the multi-tenancy when the first tenant is created. You must use the tenant admin console.
Follow the section “Alfresco 4.1 and later” in the article.
😉
Hi, Giuseppe.
I installed Alfresco 5.0 and I don’t get to open the tenant-admin console (http://localhost:8080/alfresco/faces/jsp/admin/tenantadmin-console.jsp). Do you know where the the tenant admin console is in Alfresco 5.0?
Thanks a lot.
Hi Sandro,
thanks for your comment.
You can’t open this url “on the fly” because it is filtred by the Alfresco authentication chain…
You must first login into Alfresco as admin (http://localhost:8080/alfresco), then past the tenant url in your browser.
This works for me.
Also remember that multi-tenancy feature is not enabled by default. When you install Alfresco, multi-tenancy is disabled. The multi-tenancy feature is automatically enabled when the first tenant is created.
Use the tenant web console to make it:
create tenant_domain tenant_admin_password (root_contentstore_dir)Giuseppe
How do I use my bootstrap environment In multi tenancy environment?
When you say “bootstrap environment”, do you refer to the JS framework for developing responsive?
Sorry, but this argument is out from this topic.
What I can say is that when you install Alfresco (4.1 and later), multi-tenancy is disabled. The multi-tenancy feature is automatically enabled when the first tenant is created. Only the administrator can manage tenants using the Tenant Administration Console.
Log in to Alfresco as the admin user and access: http://localhost:8080/alfresco/faces/jsp/admin/tenantadmin-console.jsp
To create a new tenant, see the commands posted in this article.
Giuseppe
I’ve noticed the admin-console should appear in a nightly build in the next few days:
https://issues.alfresco.com/jira/browse/ALF-21133