English
 Italian
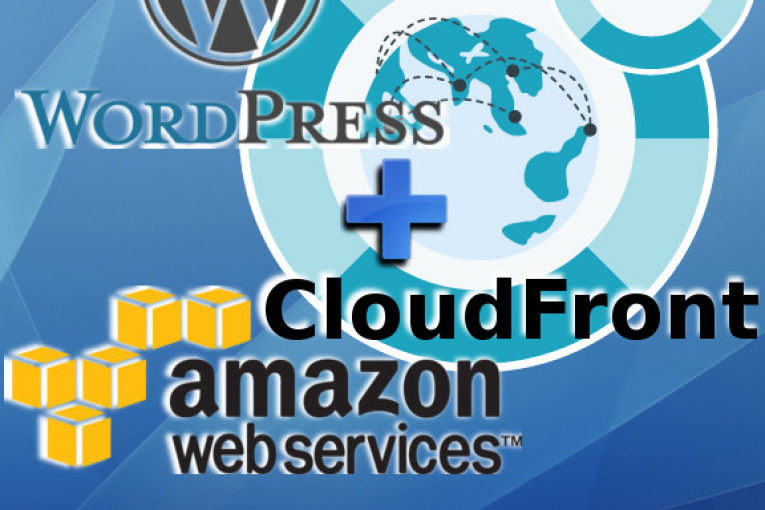
Follow a quick tutorial about a server CDN configuration in a WordPress web site using Amazon CloudFront. CloudFront is the Content Delivery Service of Amazon AWS and it is enclosed in the AWS Free Tier package. Upon sign-up, AWS users receive for free 50 GB Data Transfer Out and 2,000,000 HTTP and HTTPS Requests each month for one year. Let see how to configure a CloudFront instance with a WordPress web site.
REQUIREMENTS
– Plugin W3 Total Cache for WordPress already installed
– Active Amazon AWS account (free tier)
ROADMAP
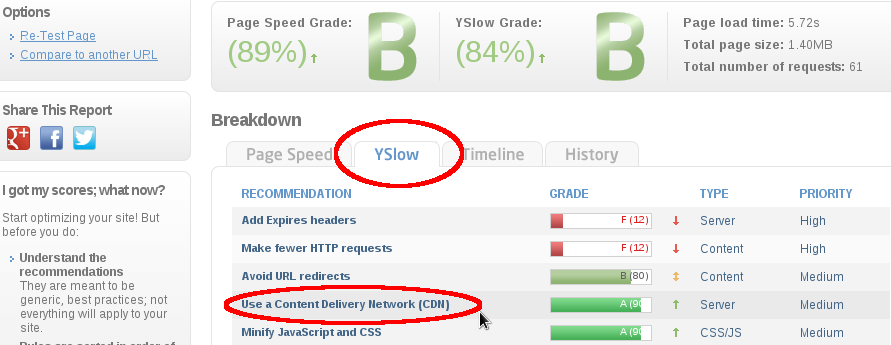
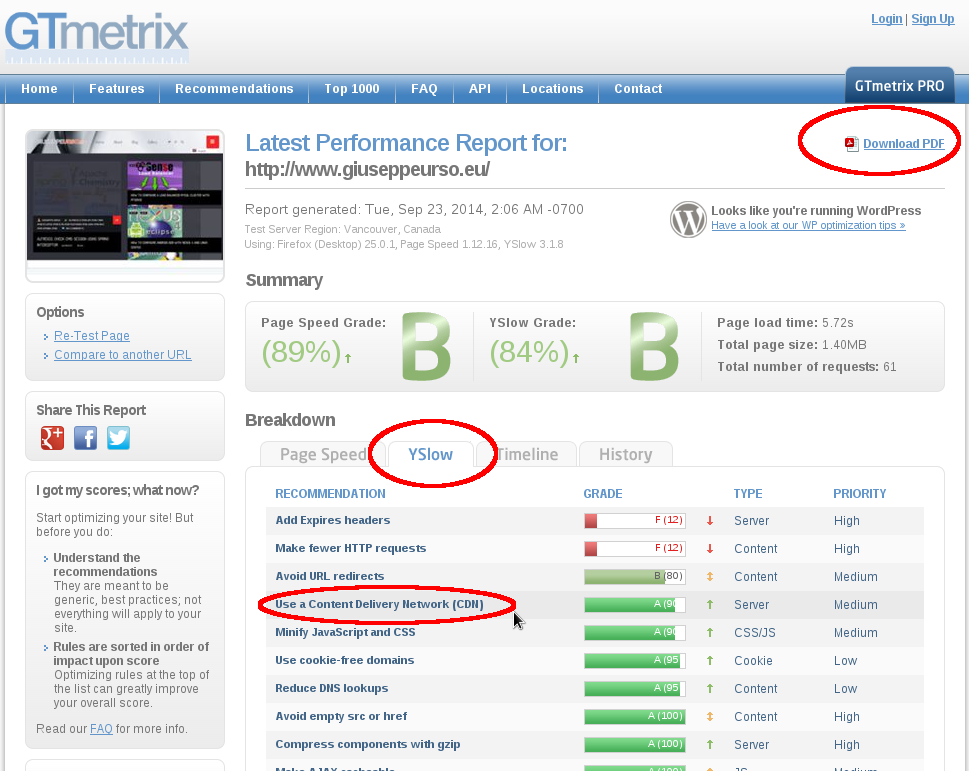
STEP 0. Test first your web site on gtmetrix.com
STEP 1. Amazon CloudFront Configuration
STEP 2. WordPress CDN Configuration
STEP 3. Test again and compare previous results
STEP 0. Test first your web site on gtmetrix.com
Open your browser on gtmetrix.com and run some performance tests. You can see the CDN results of your website in the YSlow sheet. Gtmetrix should shows a very low grade with a red bar for the CDN use.

STEP 1. Amazon CloudFront Configuration
Login into the Amazon AWS account and clic on CloudFront service
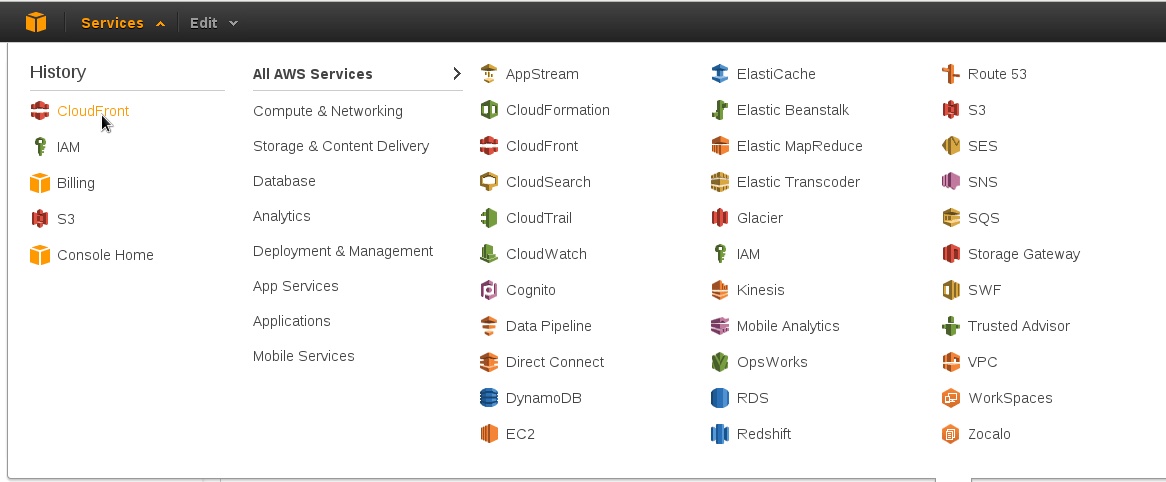
Clic on Service > Cloudfront > Create Distribution > Web > Get Started
You can set Origin Domain Name=www.yoursite.com and Origin ID=origin-001

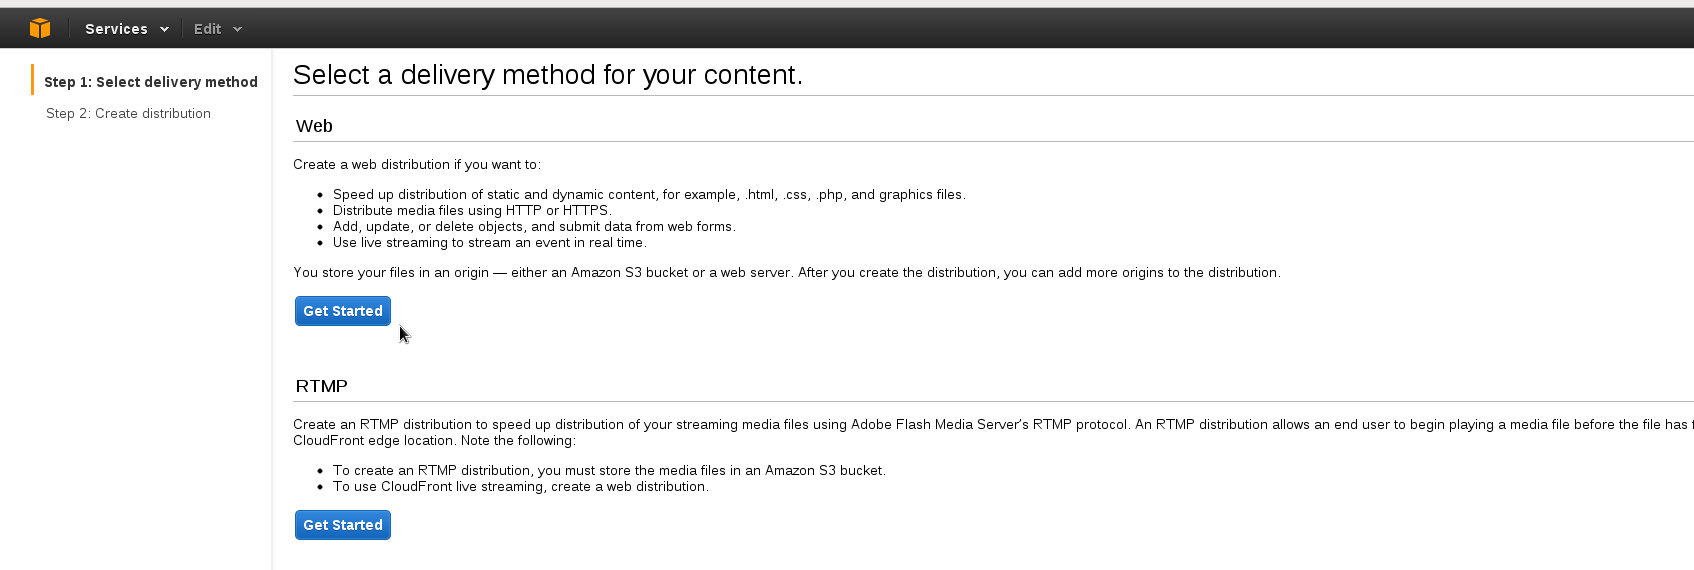
Amazon starts the CloudFront instance’s deployment using a random Domain Name like d25ds5di20s2np.cloudfront.net (you will use it later in WordPress)

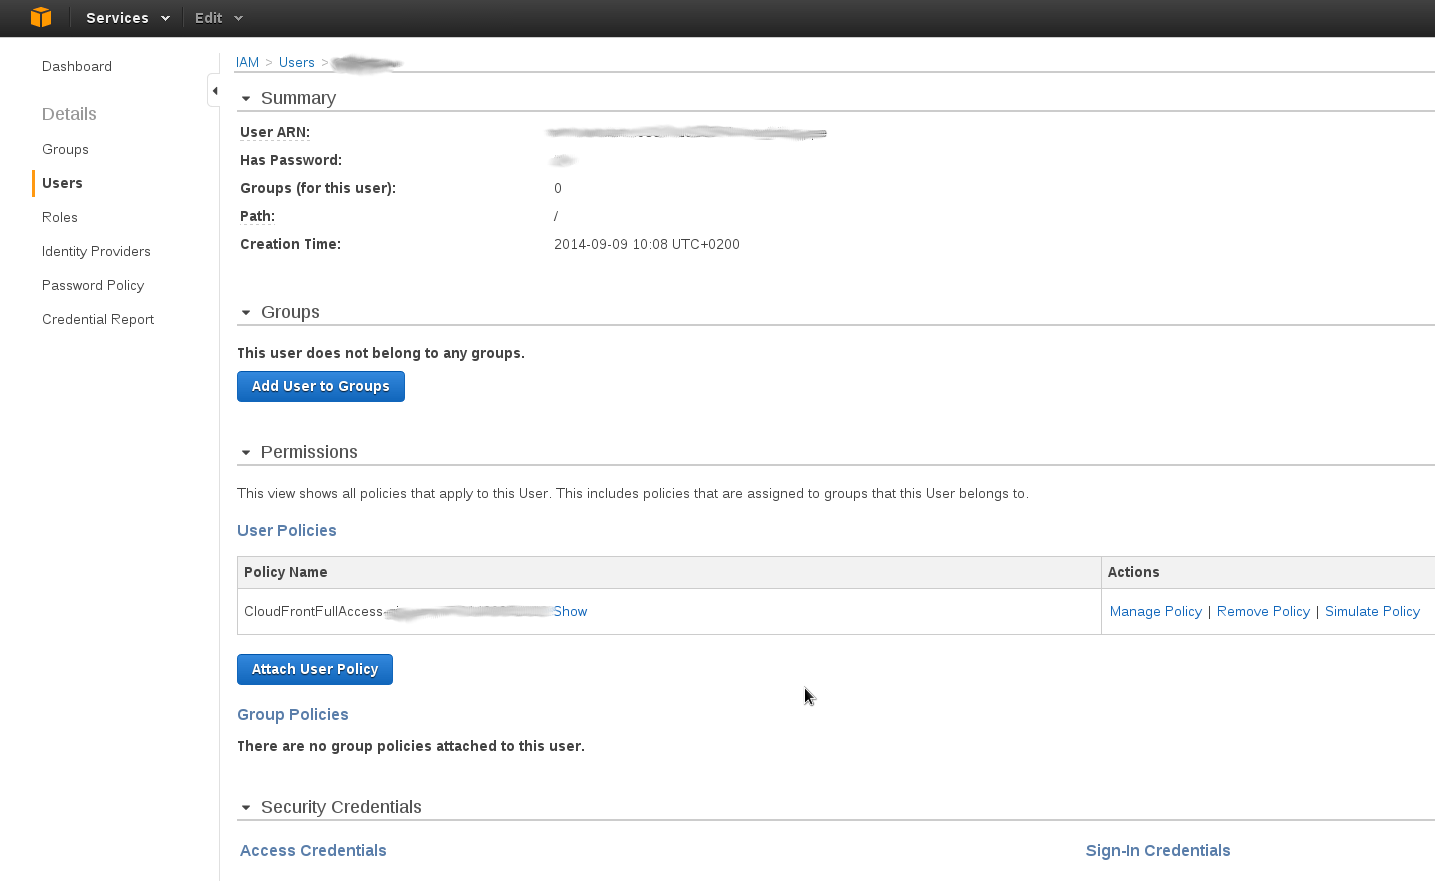
Clic on Services > IAM > Users > Create New users
Use IAM Amazon service to create a new user who will access the CloudFront instance (take note of the auto-generated key-ID and key-password)
Clic on Users > new_user_created > Attach User Policy > Select Policy Template > CloudFront Full Access > Select > Apply policy
Create a user policy for the new user (you can test the policy with the Simulate Policy link).
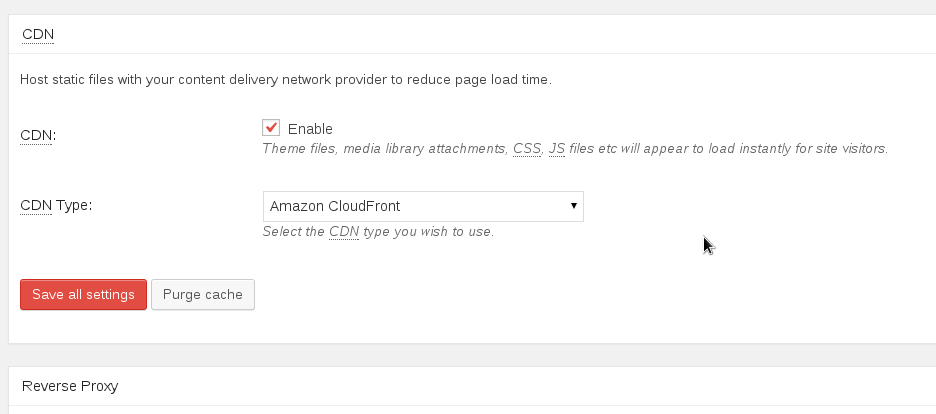
STEP 2. WordPress CDN Configuration
Login into your WordPress admini web panel and clic on Performance > General Settings > CDN
Enable the CDN check box and select the Amazon CloudFront Original Pull/Mirror
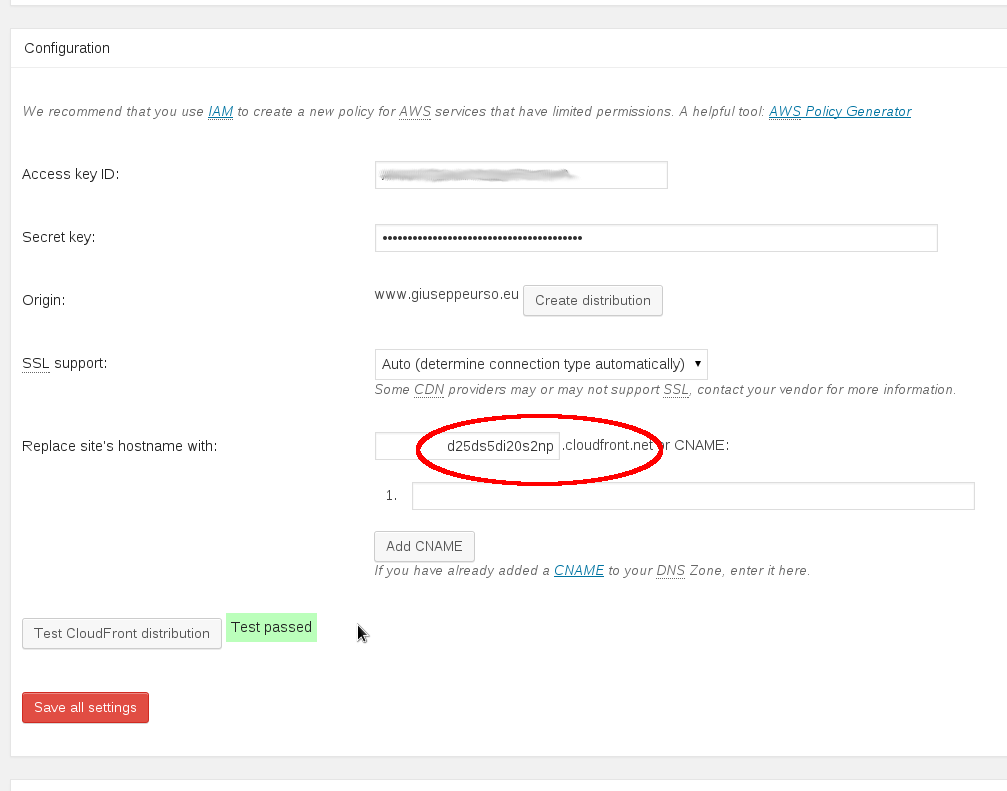
Clic on Performnance > CDN > Configuration
Set the previous generated access key ID and secret key. The Origin value is your WordPress web site. The CDN server is the previous generated Amazon DNS ID.
STEP 3. Test again and compare previous results
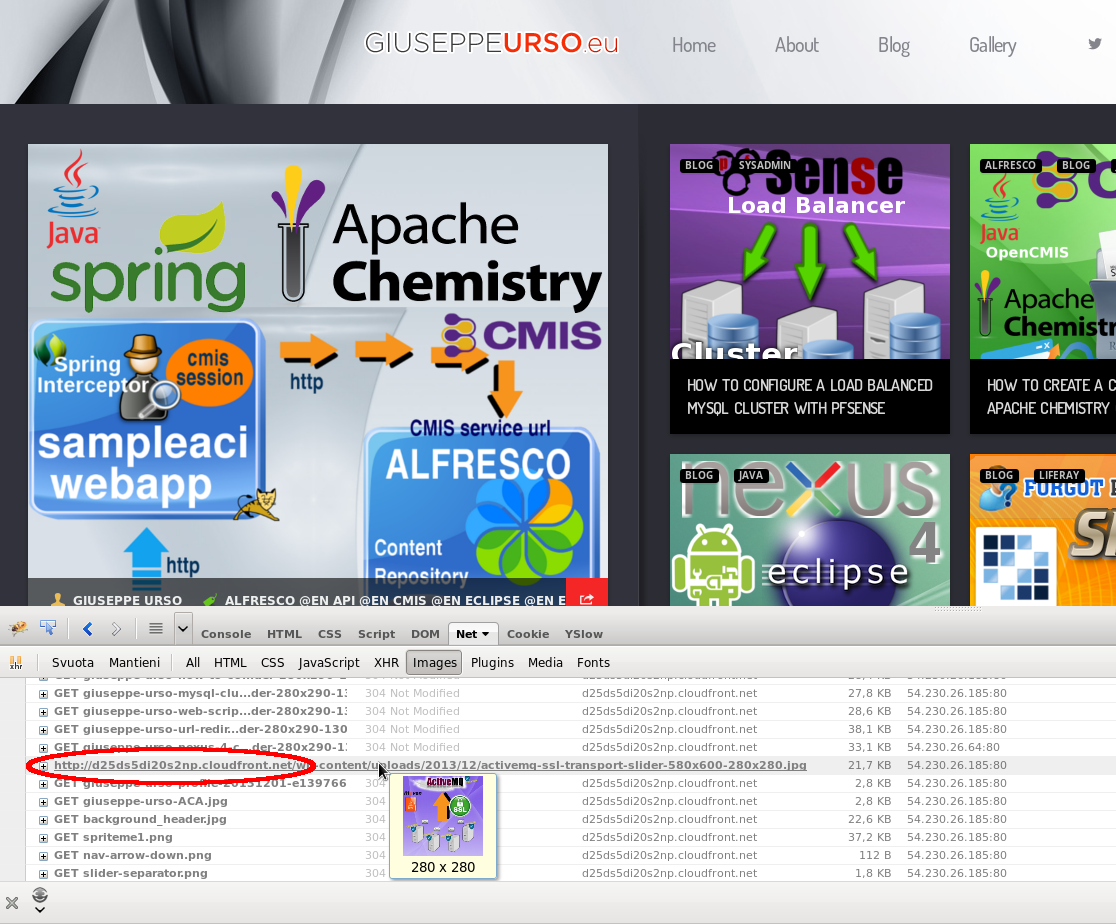
The following image shows a Firebug Net console output, after I opened my website’s home page. After the CDN setup, all the static resources (image, css, js, etc.) start with the DNS hostname of the CloudFront instance. Open gtmetrix.com and run a new test. If no error occurs, you can see now a green bar and a high grade for the CDN component.